
Inventory adjustments are essential for any business handling goods, whether a clothing store, distribution warehouse or supermarket. These adjustments correct differences between physical inventory and the quantities recorded in the system, keeping stock up to date and accurate. Odoo 15 offers several ways to make these adjustments, tailored to different needs and inventory volumes. In a clothing store, for example, you can manually adjust the number of T-shirts in a particular size, while a large warehouse can use bulk adjustments to correct an entire batch of products. In this article, we explain four ways to make inventory adjustments in Odoo 15 so you can choose the method that best fits your business.
Option 1
Go to the system's main menu and open the Products module.
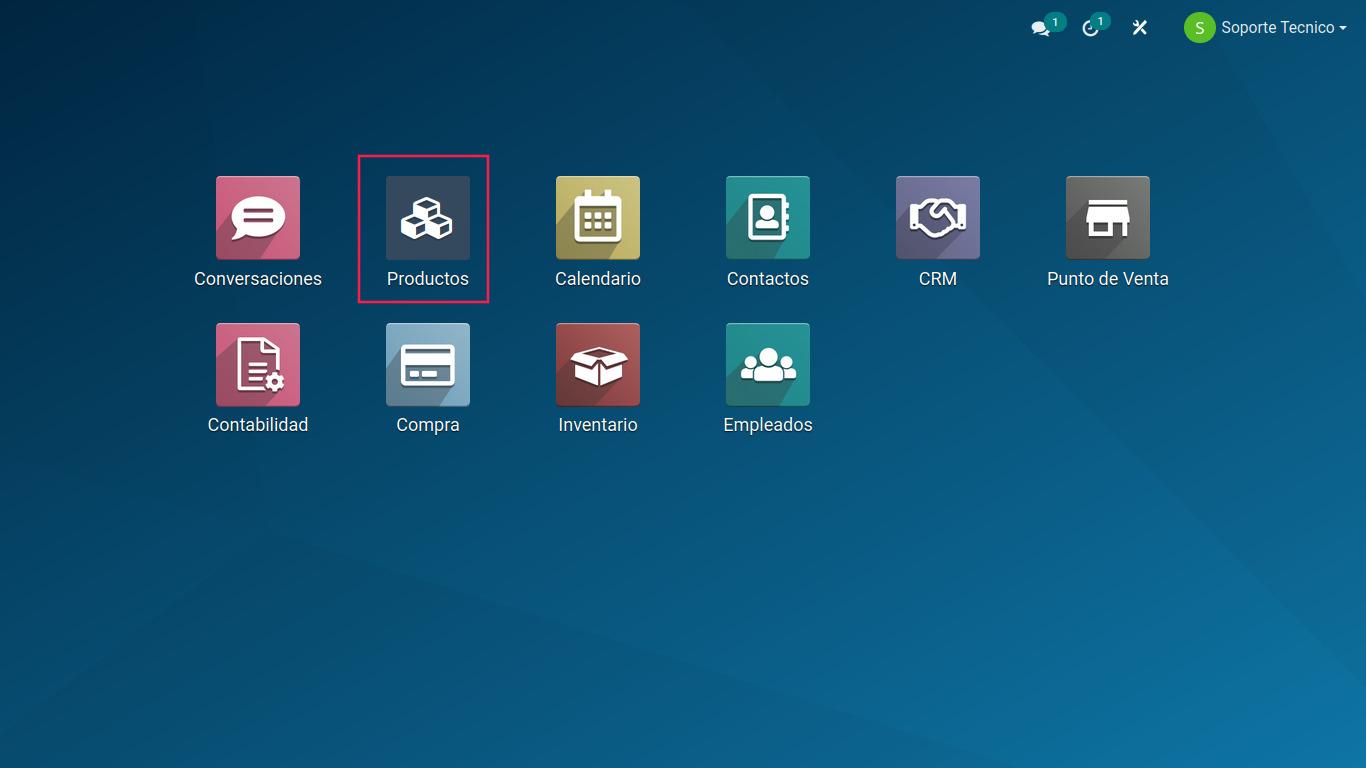
Before making an inventory adjustment, the product must already exist in the database. Here is a tutorial on "How to Create a Product"
Find and open the product whose inventory you want to adjust.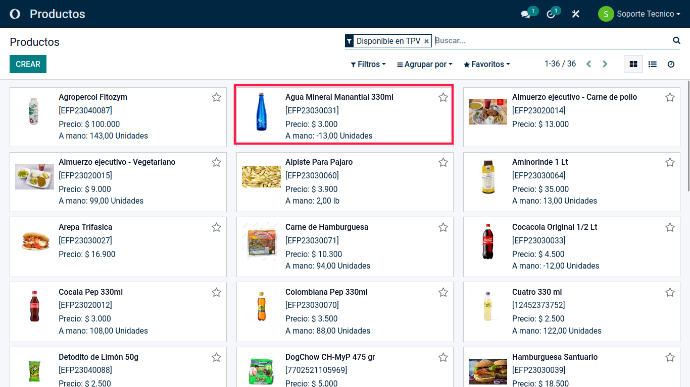
In the product view, there are 2 ways to update the quantity. In the upper-left corner, a button is labeled "UPDATE QUANTITY"
Proceed with the update.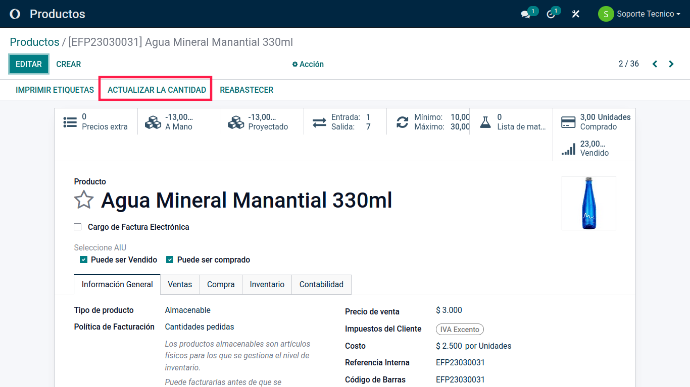
Clicking this button opens a pop-up where you can update the product quantity.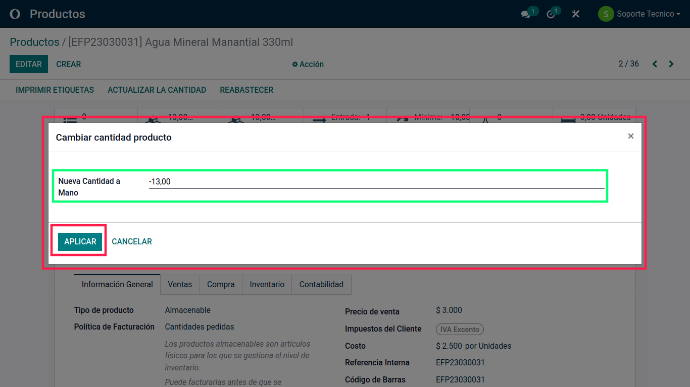
Option 2
Return to the Products module in the main menu.
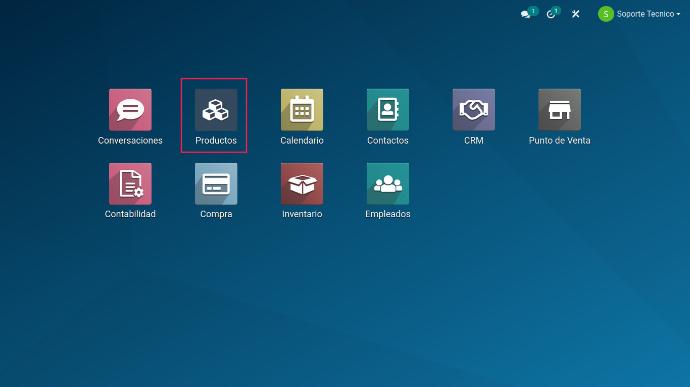
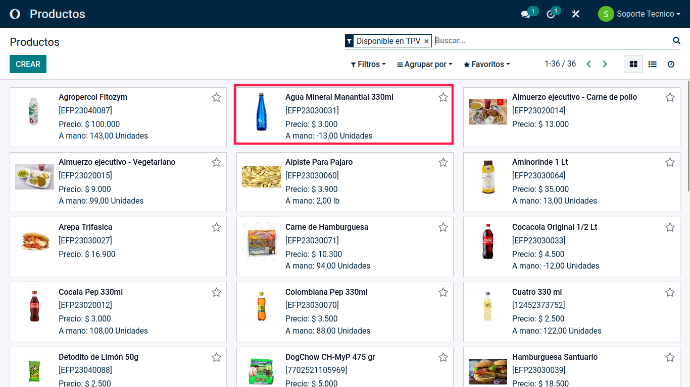
Find and open the product.
Find the product's option tabs and select "# Units On Hand"
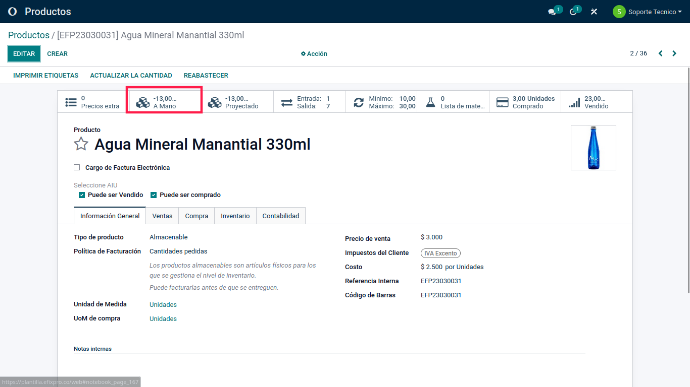
Opening this tab displays a basic table for entering data, in this case to update the inventory adjustment.
This first line does not exist by default. Click "CREATE" to add it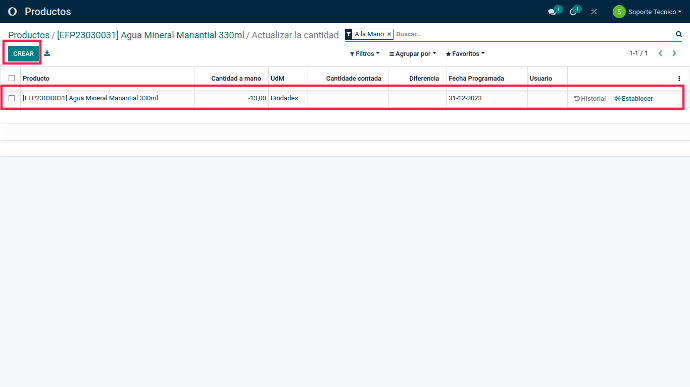
Once the first table line has been created, click it to enable several fields.
- Counted Quantity: the physical quantity of the product in inventory after a physical count.
- Scheduled Date: the date on which the physical inventory count is planned. This date can be set in advance in the company calendar to ensure counts are carried out regularly.
- User: the name or identification of the employee or user who performed the physical inventory count and recorded the necessary adjustments in the company's accounting records.
Update the information.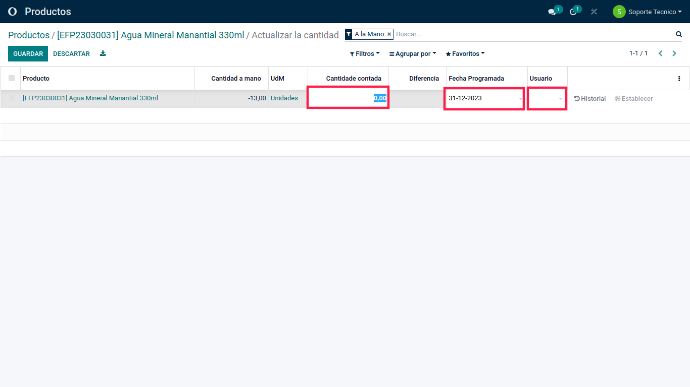
After completing the table, an "Apply" field becomes available on the right side of the same line
Finally, save the information using the button in the upper-left corner.
Recording the name or identification of the user who performed the physical count helps track who is responsible for inventory accuracy and helps identify and correct human errors that may have occurred during the count.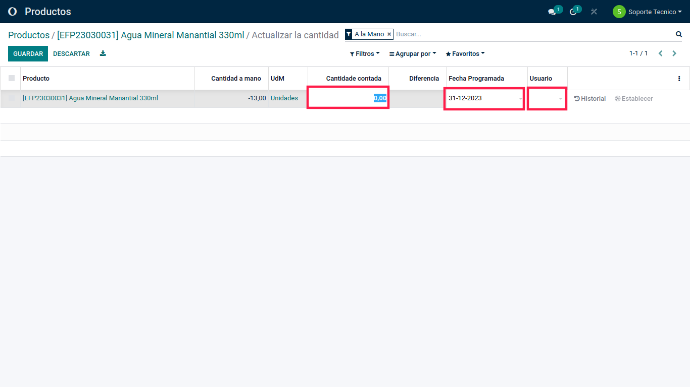
Option 3
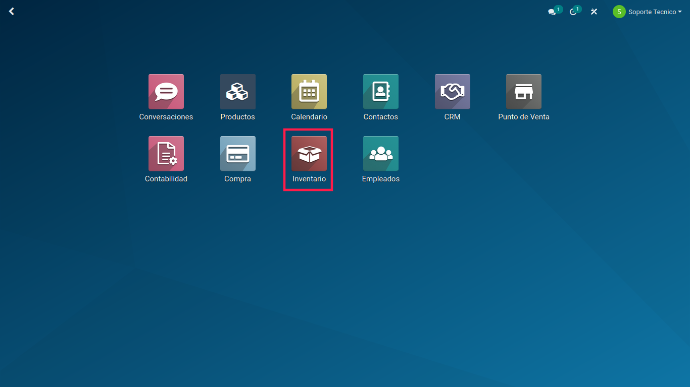
Go to the system's main menu and select the "INVENTORY" module
In the inventory view's top menu, go to the second option, "OPERATIONS"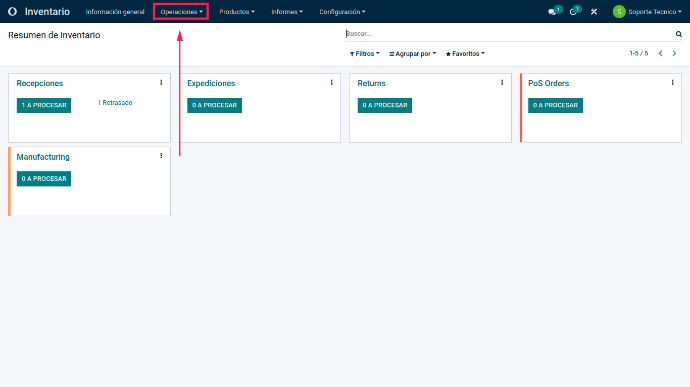
Open its drop-down menu and select "INVENTORY ADJUSTMENTS"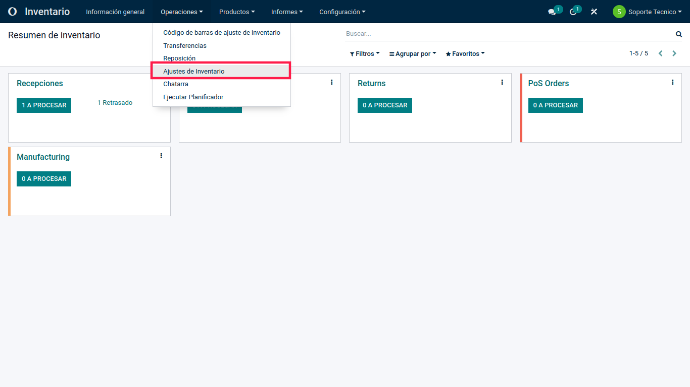
A list of all products in the database immediately opens. This view is identical to the one shown in step #8 of this tutorial.
Update the table data and the required products, apply the changes and save the information.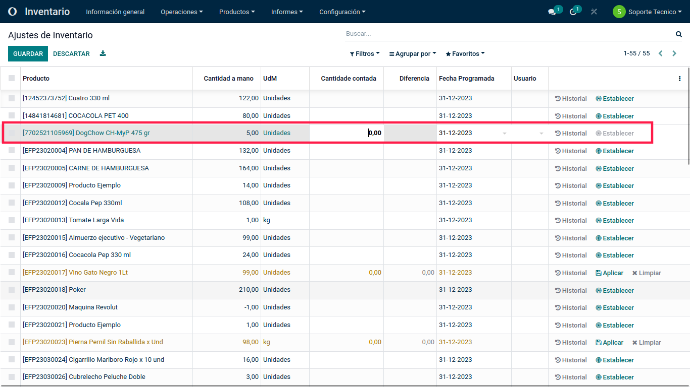
Products highlighted in yellow in the inventory adjustment table have a counted quantity different from the quantity recorded in the company's accounting records. This indicates an inventory discrepancy for that product, requiring an adjustment to correct the recorded quantity.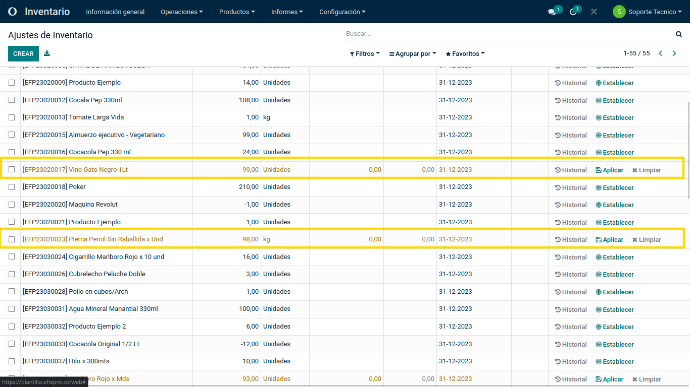
Products highlighted in yellow in the inventory adjustment table may result from situations such as human errors during the physical count, theft, losses or inventory tracking issues. Correct these discrepancies as soon as possible to ensure the company's accounting records accurately reflect physical inventory quantities.
Inventory discrepancies are corrected through the inventory adjustment process, which involves recording the counted quantity, the user who performed the count and any necessary adjustments in the accounting records. Once these adjustments have been made, inventory should be up to date and accurately reflect the company's physical stock.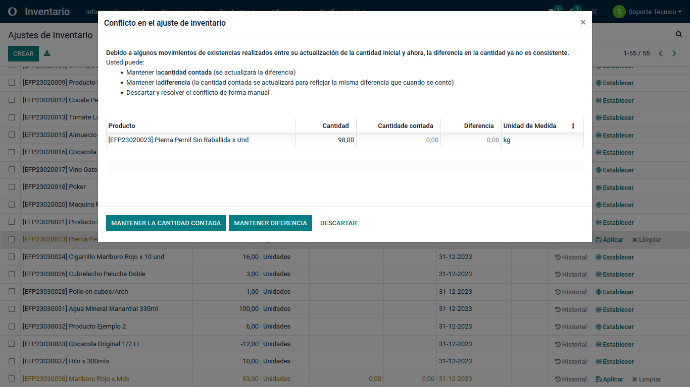
Option 4
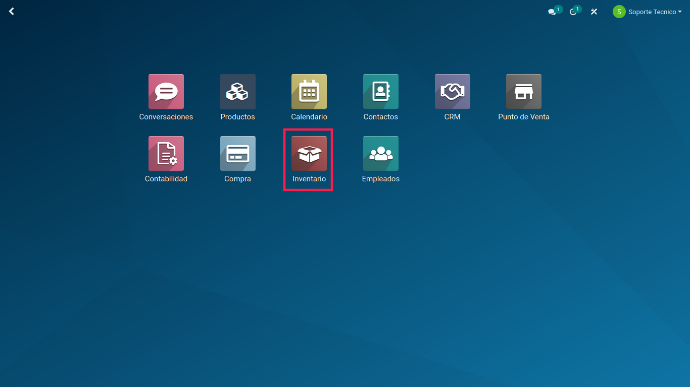
Open the Inventory module in your system using the platform's main menu
Select "Inventory Adjustment Barcode" from the inventory adjustment options menu.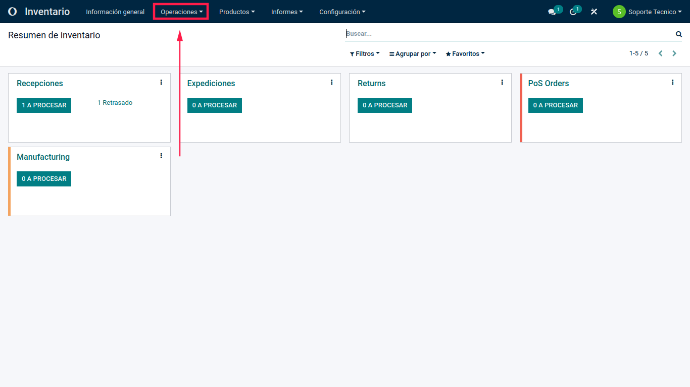
Open the required warehouse and click Add Products.

Scan the barcode of the product you want to adjust with a barcode scanner, or enter the code manually in the corresponding field.
For barcode searches to work correctly, specify or generate a barcode when creating the product.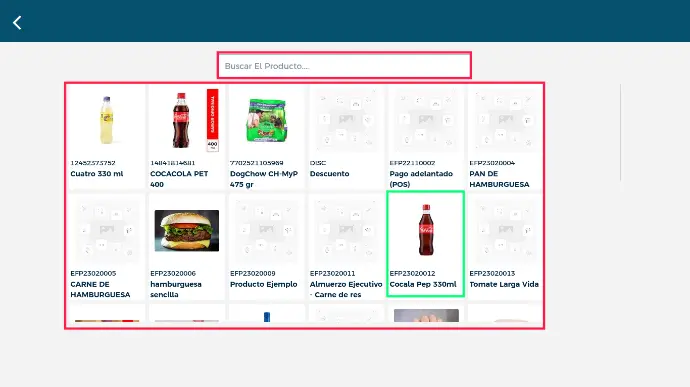
In "Counted Quantity", enter the product's current physical quantity in inventory.
If necessary, enter the name or identification of the employee or user who performed the physical inventory count in the "User" field.
If necessary, select the date originally planned for the physical inventory count in the "Scheduled Date" field.
Please note that this fourth option does not allow decimal quantities, unlike options 1 to 3.
Finally, click Confirm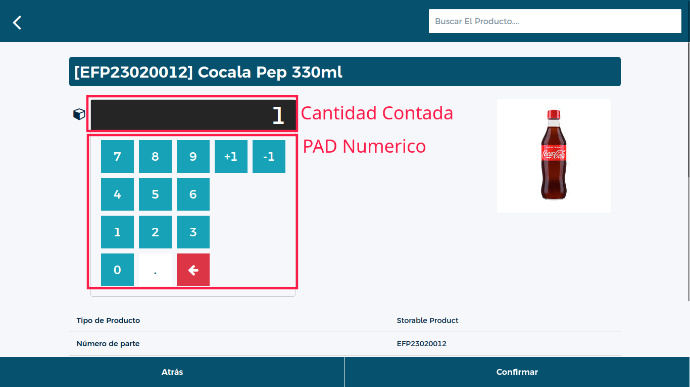
Once you have finished entering quantities for all required products, several product levels appear with the entered quantities. This provides an additional way to check that you have entered the correct amounts.
After making sure all details were entered correctly, check that the products are selected and click "VALIDATE"
Confirm the action. The system leaves this view and returns to the Inventory module.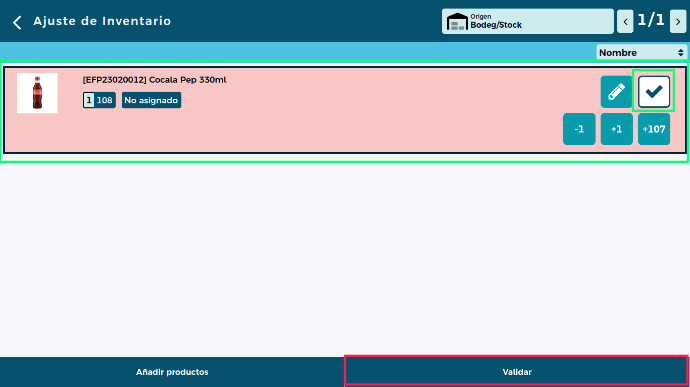
Remember to correct inventory discrepancies as soon as possible to ensure accurate accounting records and avoid future operational or financial problems.
Knowing the four different ways to make inventory adjustments in Odoo 15 gives you the tools to keep inventory organized, regardless of your business's size. Whether you make individual adjustments for specific products or bulk adjustments for large volumes, Odoo 15 offers flexibility for efficient stock management. Implementing these methods ensures inventory stays up to date and daily operations run smoothly. Try these options and improve inventory control in your company with Odoo 15!