
Creating repair orders in Odoo 15 is ideal for businesses offering technical services, such as appliance repair shops, car dealerships or industrial equipment maintenance companies. Imagine running an automotive repair shop: when a customer leaves their car for repair, you need a system to record the service details, repair status, required parts and cost. In this article, we show you how to create repair orders in Odoo 15 to manage each repair efficiently and ensure services are organized and carried out with maximum accuracy.
If you would like to use the Repairs module and do not have it, contact one of our marketing experts. We will be happy to provide all the information.
Go to the POS main menu and open the indicated module.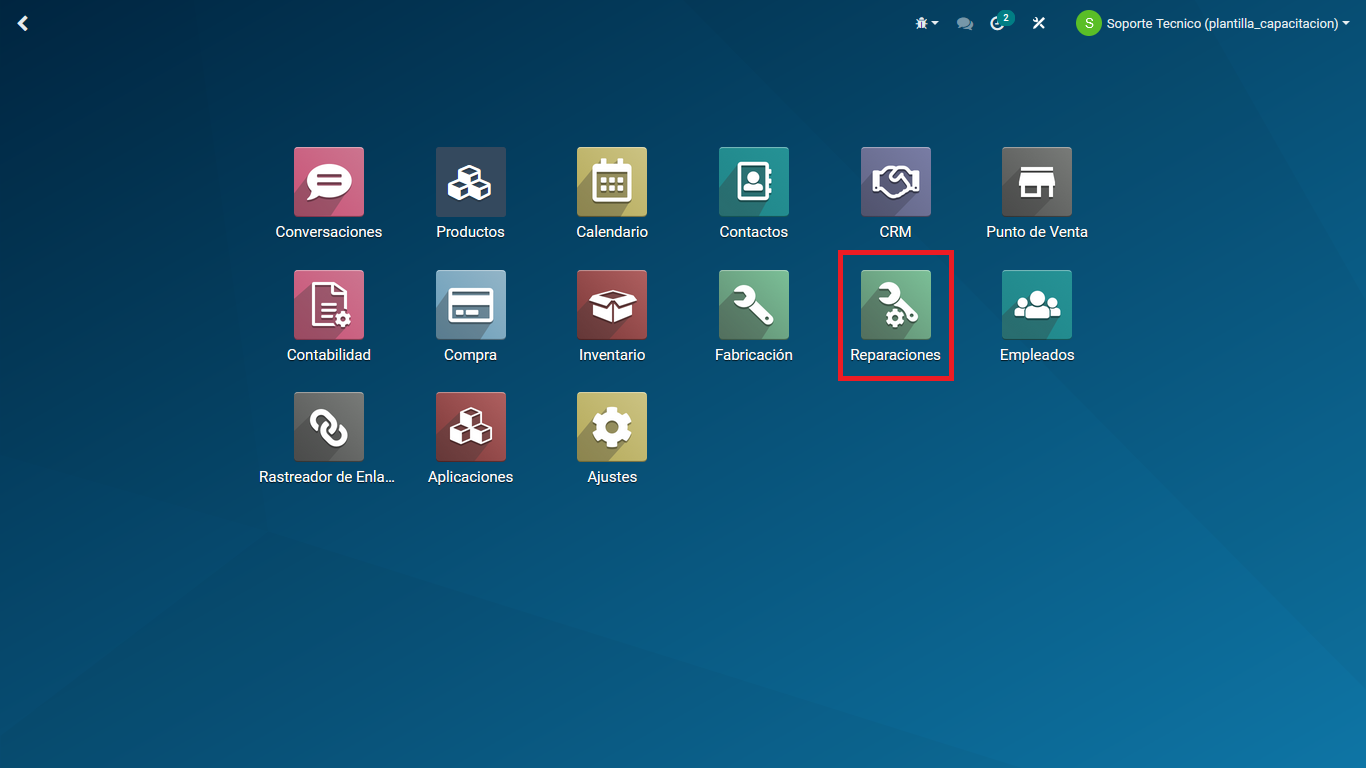
Inside the module, you can view all repair orders. Create a new one by clicking "CREATE".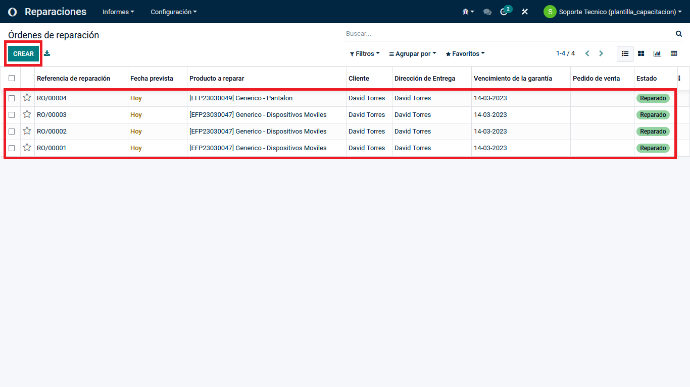
When you create a new order, the system displays a form with different data entry fields.
1. Repair description.
2. Product to Repair: the product must already be created and saved in the database. For this example, a generic product named "Generic - Trousers" was created.
(If you do not yet know how to create a product, follow this link)
3. Quantity of products to repair.
4. Customer: assign a customer to the order. The customer must already exist in the database.
(If you do not yet know how to create a customer, follow this link)
5. Responsible: enter the user/employee creating this order
6. Expected delivery date
7. Location: where the products are stored. The default option is "Bodeg/stock"
8. Warranty Expiration: delivery deadline
9. Invoicing method (with 3 possible options)
- No Invoice: the system skips invoice creation for this order
- Before Repair: the system generates an invoice before invoicing the repair order. This applies to companies that allow customers to pay half the order amount, or another amount, in advance
- After Repair: the system generates the invoice at the end of the repair, when payment is due
10. Pricelist: enter the pricelist you want to use to adjust the order's final amount
(If you do not yet know how to create a pricelist, follow this link)
11. Categories.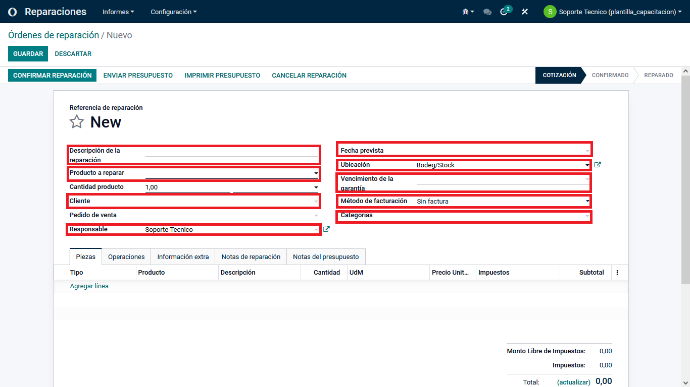
This image shows the basic initial fields with these example details.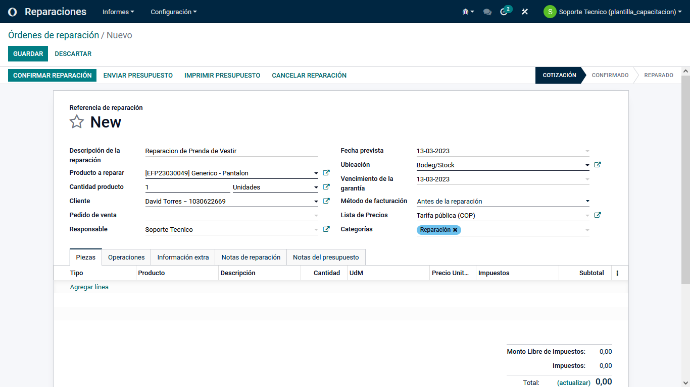
Now fill in the additional, optional fields in the tabs at the bottom of the form.
Go to the "Parts" tab. Enter the products that will be used for this repair order here by clicking the internal "Add a Line" link.
Add the products to be used in the Products column. They must already exist in the database.
Add a unit price if applicable.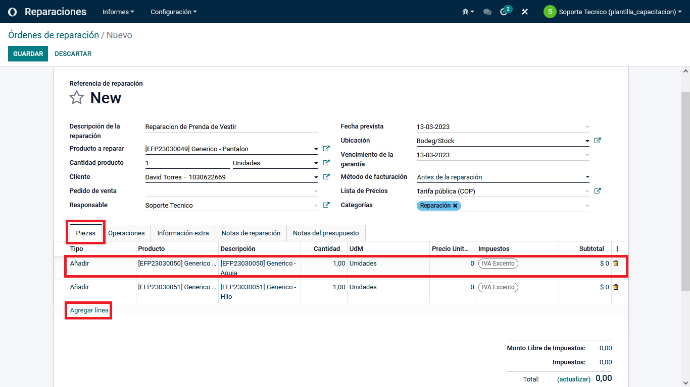
Now fill in the additional, optional fields in the tabs at the bottom of the form.
Go to the "Operations" tab. Add the services to be performed on the garment here. Again, these products must already be created and saved in the database. For this example, add a final product named "Repair - Labor", whose default sales price is 0. This allows you to enter the price in this section according to the labor cost you want to assign to this garment.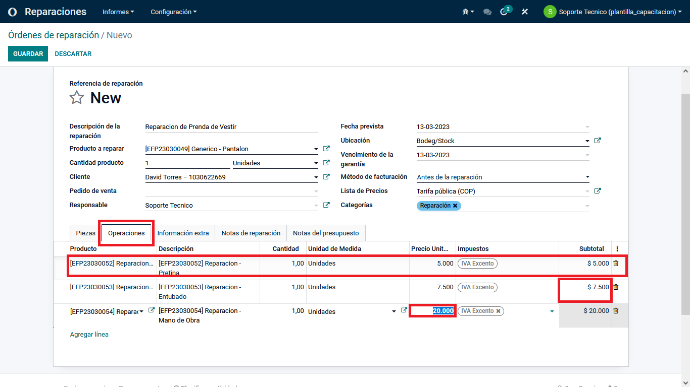
Now fill in the additional, optional fields in the tabs at the bottom of the form.
Go to the "Repair Notes" tab. This field appears on the invoice for companies that need both the customer and the person responsible to see exactly what work will be carried out on the garment.
After completing all fields, save the repair order/invoice.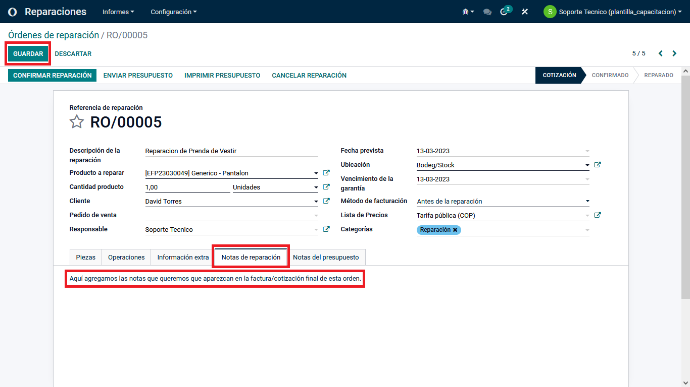
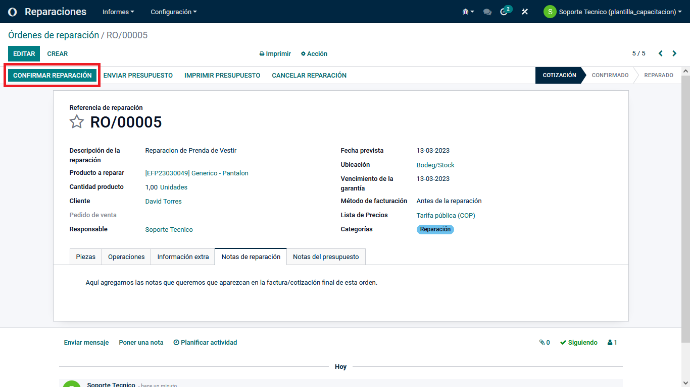
After saving the repair order, check that everything is in place and click Confirm Repair.
This section lets you create an invoice. It appears in this case because "Before Repair" was selected as the invoicing method earlier.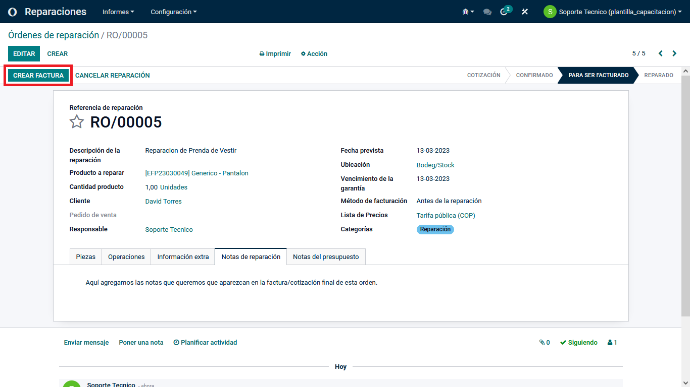
Go to the "Invoice" tab in the upper-right corner
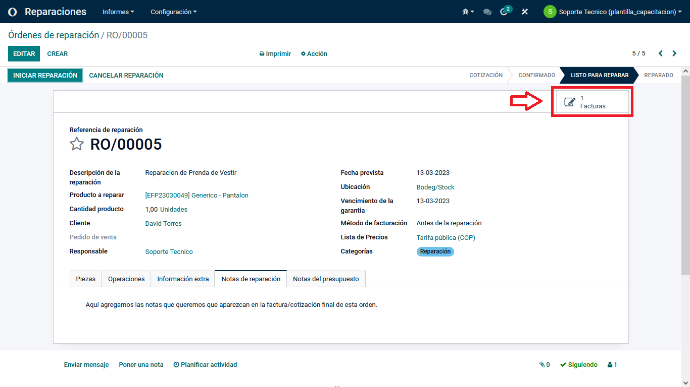
The system generates a draft invoice so you can confirm the details before actually creating the invoice. This is a precaution, because once the invoice is created, you cannot return to the earlier steps.
If everything is correct, click "CONFIRM"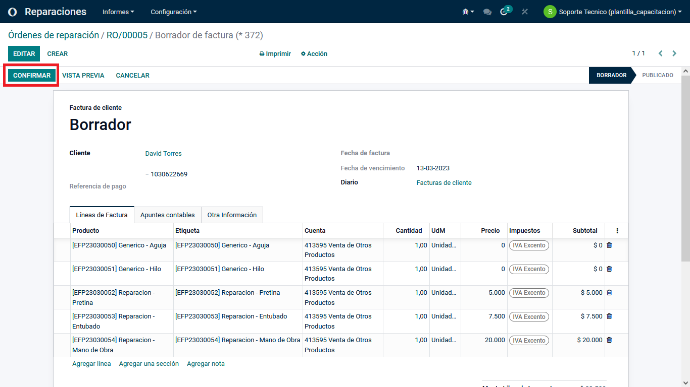
Finally, you can print the order/invoice from this view. If you need the order and/or invoice to show an initial payment, click "REGISTER PAYMENT" before printing.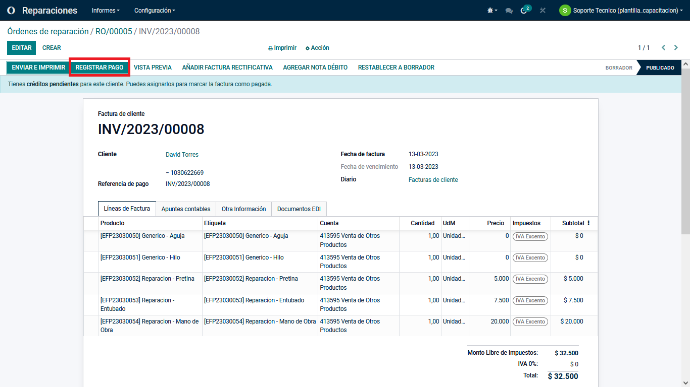
Clicking this button opens a second form for entering the initial payment details.
You must select "Journal" before entering the other details, because entering them in a different order may change the amount.
Enter the amount. In this example, only half the invoice total was entered. Doing this enables an additional "Payment Difference" field, where "Keep open" must remain selected
Enter the payment date. The system automatically generates a payment reference.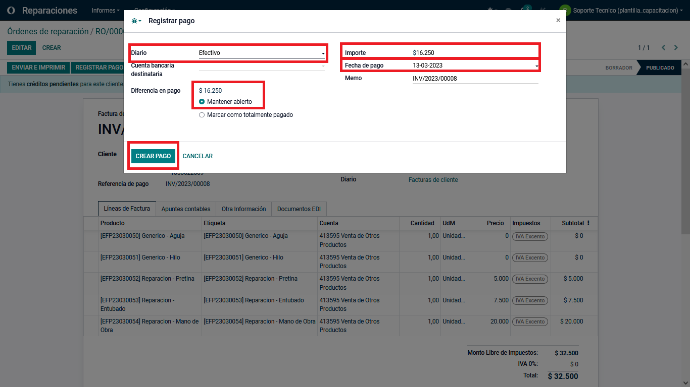
After saving these details, the invoice automatically changes to "Partial" status. To register the final payment, repeat the action from the previous step.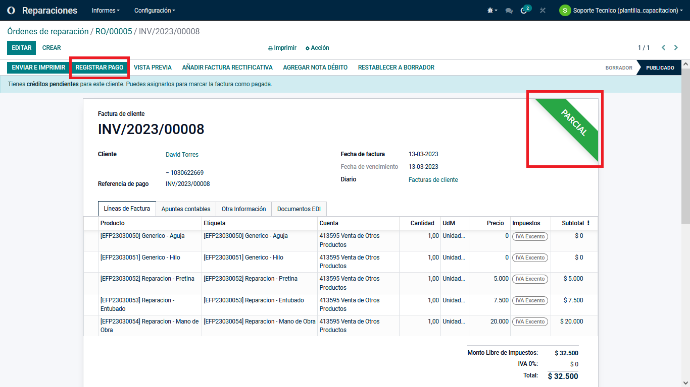
Once payment is complete, the invoice changes from Partial to "In Payment", and the repair and delivery of the repaired product are complete. Invoices in payment must be reconciled in the Accounting module.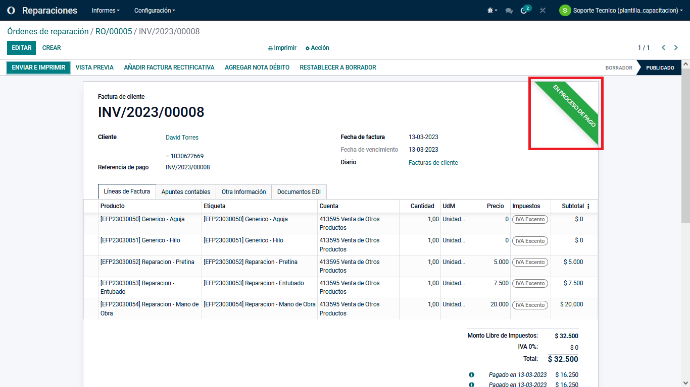
Creating repair orders in Odoo 15 gives you full control of your business's repair process. Whether you manage a bicycle repair shop, an appliance repair center or an industrial maintenance company, this tool lets you track every step of the service, from receiving the product to final delivery. Repair orders let you detail the materials used, hours worked and associated costs, improving transparency and customer satisfaction. Integrate this feature into your business and take repair management to a new level with Odoo 15!